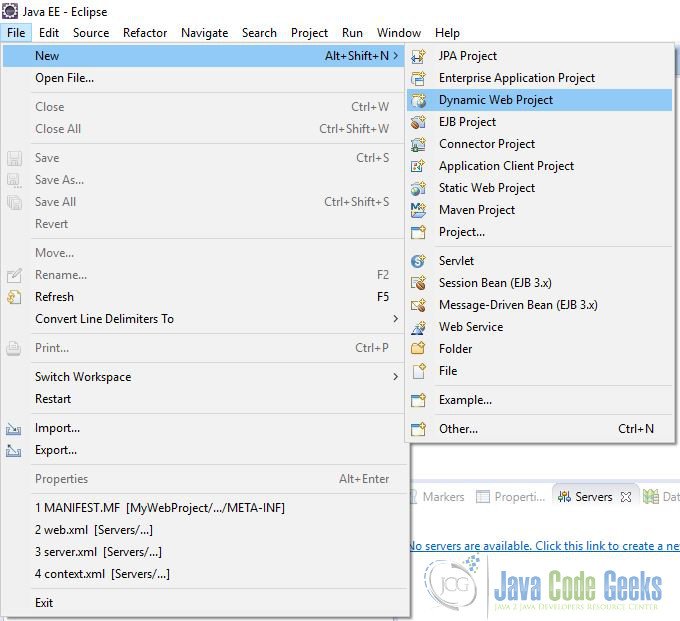
2. Go to File => New => Dynamic Web Project
 If you don’t see the ‘Dynamic Web Project’ option choose Other and in the Wizards text box start writing ‘Dynamic Web’.
The Web development environment provides the tools we need to develop Web applications as defined in the Sun Microsystems Java™ Servlet 2.3 Specification and the Sun Microsystems JSP 1.2 Specification. Web applications can be simple (consisting of only static Web pages) or they can be more advanced and include JavaServer Pages (JSP) files and Java servlets. These resources, along with an XML deployment descriptor (and other Web resources, are contained within a Web project during development. We deploy the Web project to the server in the form of a Web archive (WAR) file once it’s ready. The end user can then view the Web application as a Web site from a URL.
The integrated Web development environment makes it easy to cooperatively create, assemble, publish, deploy and maintain dynamic, interactive Web applications. In this tutorial we will see how we can develop a web application using eclipse.
In most cases, all of the resources that we need to create for our Web application are developed during Web site or Web page design; However, there are additional resources that we may need to include in our Web project if we are using more advanced Web technologies in your application. These Web resources are not typical Web page files, and are often not the resources that we consider part of the final Web site. For example, tag libraries and Java™ resources, such as JAR files, are resources we might need to include in our Web project. In fact, even the WAR file itself could be considered a Web resource, if we consider importing or exporting the resource.
Web pages are an integral part of every Web application. Each Web page should serve to help achieve the overall goal of the entire Web site. There are many types of Web pages, ranging from simple HTML pages that contain no dynamic elements, to advanced Java-based pages that make use of servlets, scripts, forms, or data access components. A few of the many items you should consider when designing your pages are markup language, links, images, and style sheets.
Web projects hold all of the Web resources that are created and used when developing your Web application. The first step to creating or importing a Web application is to create either a static or a dynamic Web project. Static Web projects are meant to contain only simple Web site resources, such as HTML files. Dynamic Web projects are used to structure Web applications that will use more complicated, dynamic Web technologies, such as JavaServer Pages files, and possibly data access resources. Though the Web project is structured on your file system in compliance with the Java EE Web application standard for deployment purposes, the Project Explorer view is designed to show the most convenient display of project resources for use, while you are actually developing the Web application. When you are finished developing your Web application, you use the Web project to deploy the correct resources to the server. These resources will be packaged in a file called a Web archive, or WAR file.
A Web application is a group of HTML pages, JSP pages, servlets, resources and source file, which can be managed as a single unit. A Web archive (WAR) file is a packaged Web application. WAR files can be used to import a Web application into a Web server. In addition to project resources, the WAR file includes a Web deployment descriptor file. The Web deployment descriptor is an XML file that contains deployment information, MIME types, session configuration details, and other settings for a Web application. The Web deployment descriptor file (web.xml) provides information about the WAR file and is shared with the developers, assemblers, and deployers in a Java EE environment.
You create and maintain the resources for your Web applications in Web projects. Unlike with static Web projects, dynamic Web projects enable you to create resources such as JavaServer Pages and servlets. To create a new dynamic Web project, complete the following steps: 1. Open the Java EE perspective
2. Go to File => New => Dynamic Web Project If you don’t see the ‘Dynamic Web Project’ option choose Other and in the Wizards text box start writing ‘Dynamic Web’.
3. In the pop-up enter the Project Name. For our example we will choose MyFirstDynamicProject. Choose the project location and the Target runtime. Use this field to define a new installed runtime environment. Runtimes are used at build time to compile projects. For our example we will use Tomcat 7.0. If you haven’t downloaded the Apache Tomcat you can do this from Tomcat 7.0. For the Dynamic web module version we will use 2.5. Leave the other fields as it is and click ‘Finish‘ 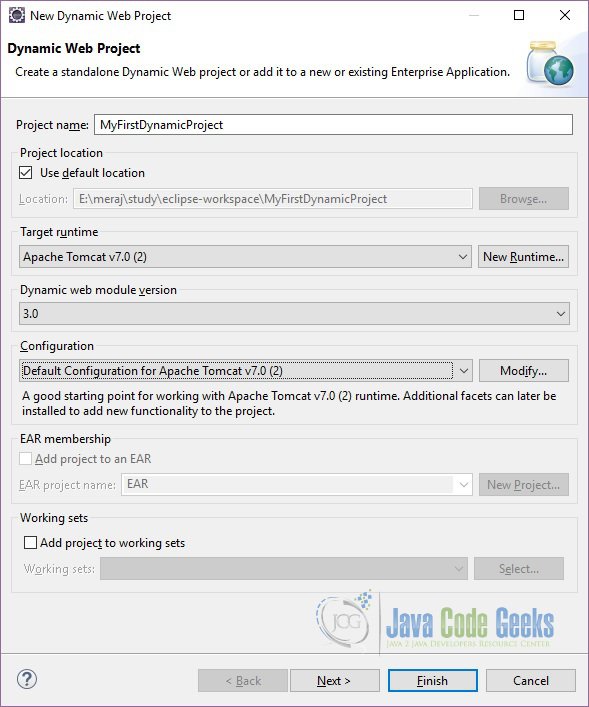 On the next pop-up click ‘Next’. In the next pop-up (Web Module) you can define the Context root and content directory. For our example we will leave the default values as it is.
 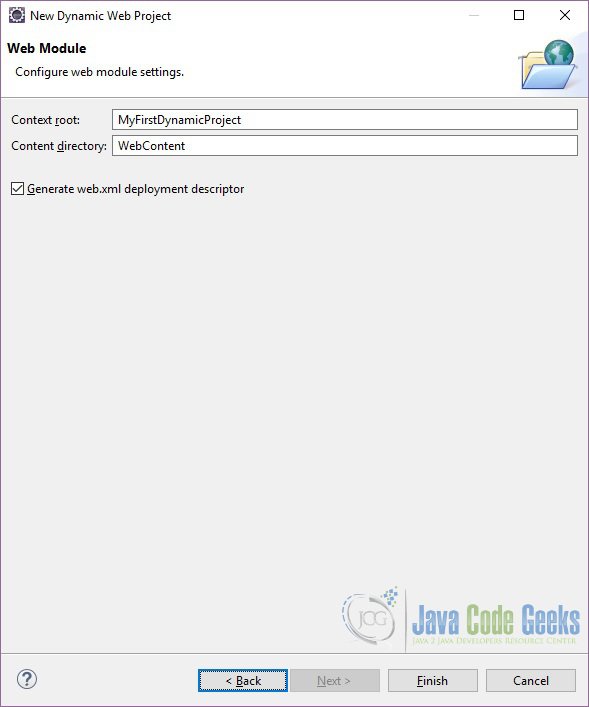 Click ‘Finish’. Eclipse will generate some files.
 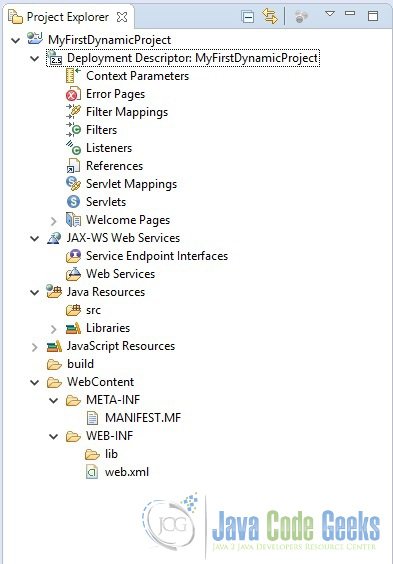 Now lets create a very simple servlet for our example. Right click on the ‘src’ folder and choose New=>Package. Give the package name (com.javacodegeeks). Click Finish. Now right click on the package and choose New=>Servlet. Give the servlet name (MyServlet) and click ‘Finish’.
 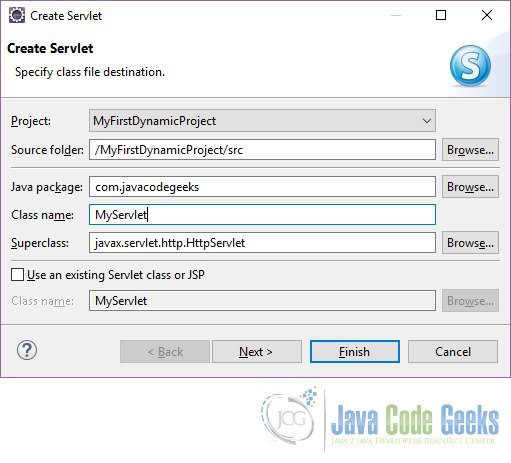 Eclipse will create a sample MyServlet class with two methods – ‘doGet()’ and ‘doPost()’. These are the two most important methods of any servlet. You can read more about these methods here: doGet(), doPost(). Now lets update the doGet() method. First we will get the reference to the PrintWriter by calling the response.getWriter() method. This returns a PrintWriter object that can send character text to the client. The PrintWriter uses the character encoding returned by getCharacterEncoding() . If the response’s character encoding has not been specified as described in getCharacterEncoding (i.e., the method just returns the default value ISO-8859-1), getWriter updates it to ISO-8859-1. Calling flush() on the PrintWriter commits the response. Either this method or getOutputStream() may be called to write the body, not both. The doGet() method will look like below:

Now lets test the application. Fist we need to start the server. To start the Server right click on the server and select Start. Once the server is started successfully, go to your preferred browser and type this URL: http://localhost:8080/MyFirstDynamicProject/MyServlet and press enter. You will see the text you set in the print writer is displayed. Now lets understand what the composition of URL. URL stands for Uniform Resource Locator. It is a reference to a web resource that specifies its location on a computer network and a mechanism for retrieving it. The first part of the URL is the scheme. In out case it’s ‘http’. ‘http’ is referred to as Hyper Text Transfer Protocol. ‘localhost’ refer to the machine where our application is deployed. In our case it’s the localhost. After the host, we provide the port where the application is listening to. After the post, we provide the context root. For our application it’s the same as the project name. You must be wondering what the last part (MyServlet) is ? When we created the default Servlet using Eclipse, Eclipse update the web.xml with the below entries:
MyServlet MyServlet com.javacodegeeks.MyServlet MyServlet /MyServlet
A facet represents a unit of functionality in a Web project. For example, the Dynamic Web Module facet enables the project to be deployed as a dynamic Web module. A brief description of a project facet appears in the wizard when you select it. Note that in many instances, you can view the constraints for a project facet by right click on the facet and select project constraints from the pop up menu.